Local, Private, AI Code Assistant
Mar 3, 2025
3 mins read

Recently, products like Claude Code, Cursor, and Copilot have sprung to the forefront of my social media. I’ve ignored these for quite some time, but a coworker recommended that I try out <some product I can't remember> after I was fighting a particularly gnarly public codebase that had opaque documentation and involved a LOT of state machines.
“Yeah, just clone the repo and let the AI deal with it. It’ll index all of it and at least get the scaffolding”
And to be honest, at that point I was ready to try just about anything.
But in my classic style, I am not keen on privacy invading analytics, nor am I fond of sending data to a remote paid LLM endpoint that costs money.
So, I figured out how to do it all locally, preserve privacy, and save money.
You will need 3 key things:
- LM Studio
- VSCode
- Continue (VSCode Extension)
LM Studio
Download it here for all platforms:
Start the application, then click the magnifying glass icon in the left hand panel.
Search for “code” models. “32B” is best but slowest, “14B” is a nice middle ground (the one I chose), 7B is small and fast. Technically, you can use any model and play around, but we’ll be to that later.
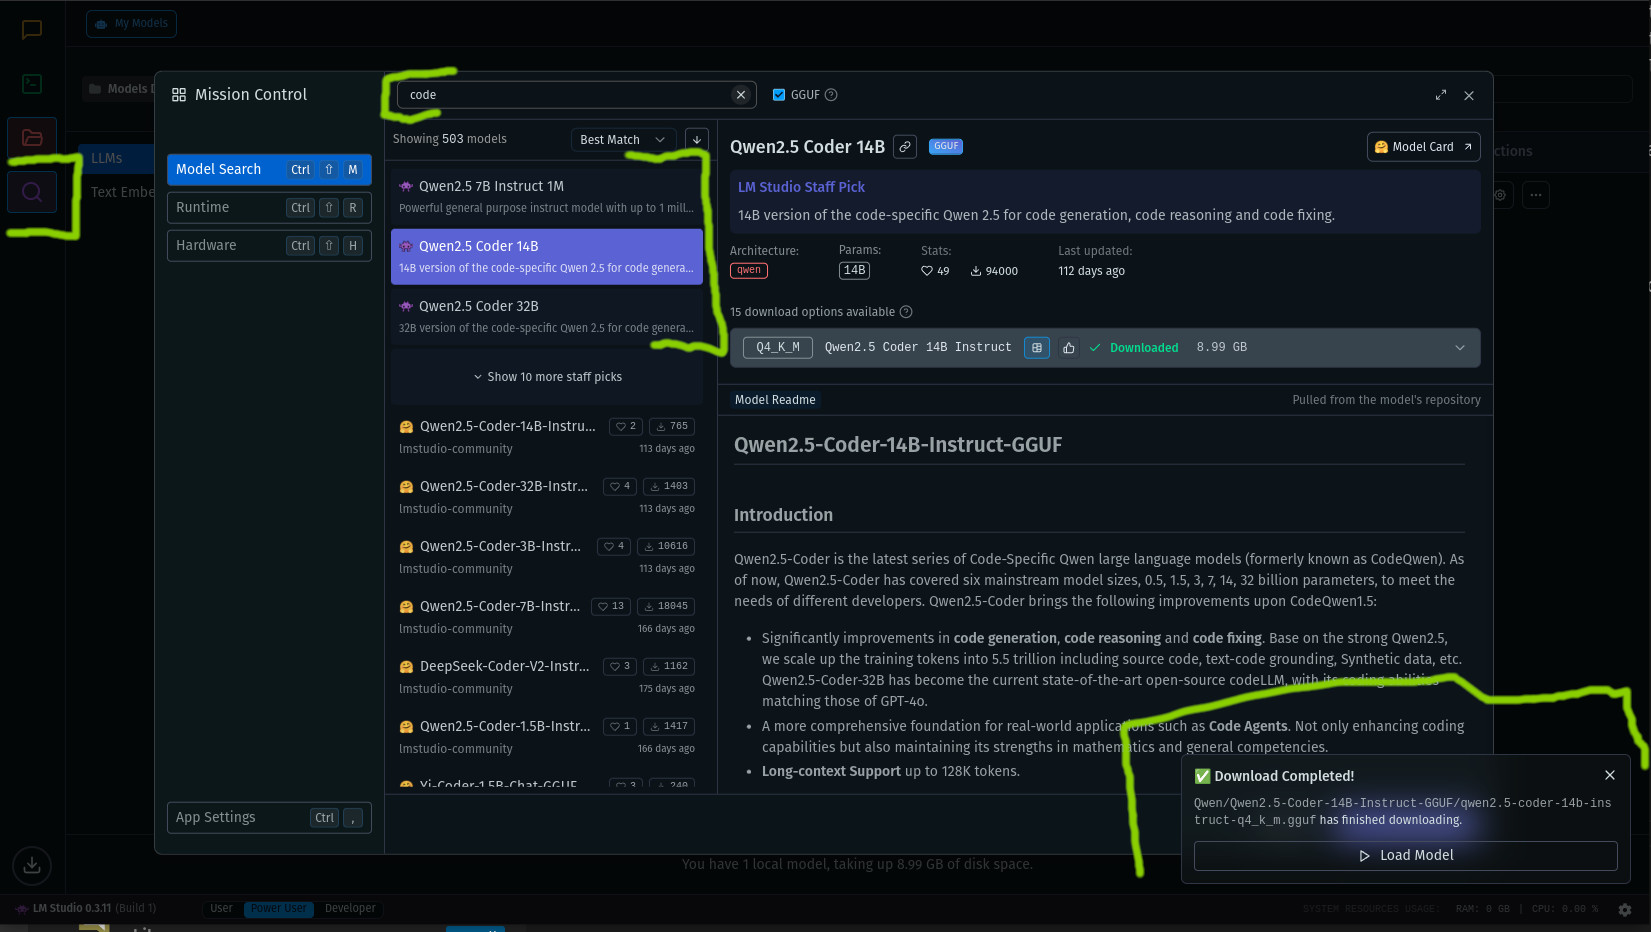
Click to download the model. When it’s done, navigate the the green terminal icon in the left hand panel, and flick the server to “ON”.

Congrats! You’re now hosting a large language model!
VSCode
The site is here: https://code.visualstudio.com/
I’m not gonna explain this one. If you don’t know how to install a code editor IDE you shouldn’t be using an AI to assist with coding.
Continue
In VSCode, hit (CTRL+P) and paste ext install Continue.continue to install the extension.
The magic!
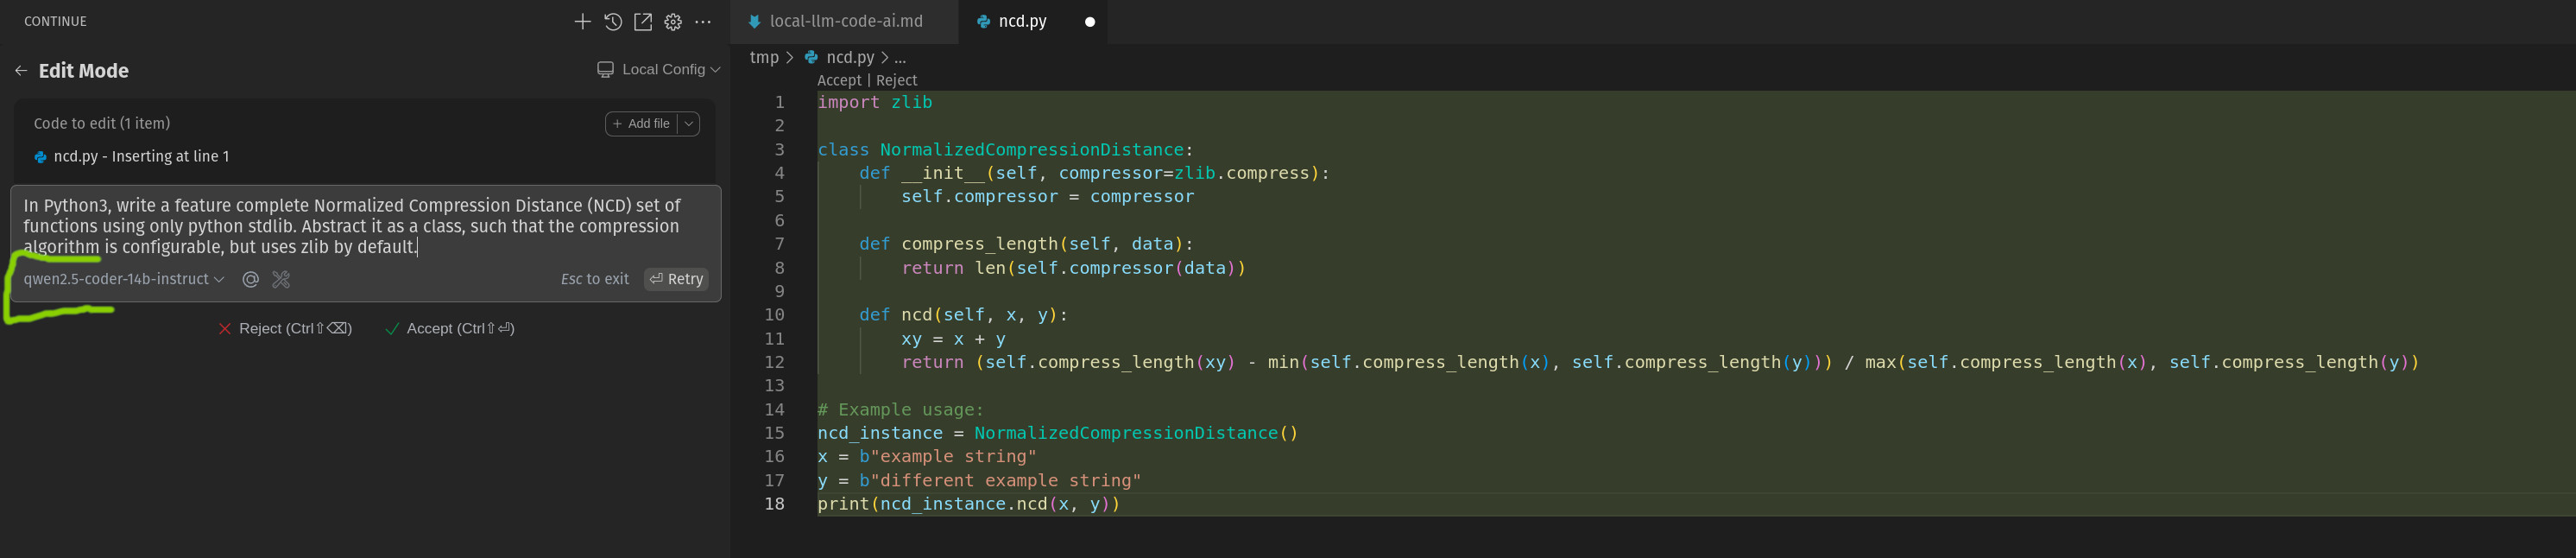
In VSCode, open a new file (File –> New File). In the window you should see a prompt that says “Use Ctrl + I to generate code”
So hit those buttons, and the magical window will appear in the left hand panel for AI code assistance. It’ll say to sign in, or create and account, or all that nonsense.
Ignore it.
Go to this link, which will open the exact VSCode setting to disable telmetry:
…and disable telemetry.
UPDATE: In never versions of Continue, you no longer need to populate the config with all values. You can simply reference the lmstudio provider and set it to AUTODETECT in ~/.continue/config.yaml:
name: Local Assistant
version: 1.0.0
schema: v1
models:
  - name: Autodetect
    provider: lmstudio
    model: AUTODETECT
context:
  - provider: code
  - provider: docs
  - provider: diff
  - provider: terminal
  - provider: problems
  - provider: folder
  - provider: codebase
Older versions:
Then, we’re gonna use a handy little script. Remember that LM Studio “server” switch we threw to “ON” in the earlier section?
Well, it makes a list of all downloaded models available at http://localhost:1234/v1/models, so the following script is going to query those, parse them, and directly shim them into the Continue VSCode extension’s models.
You can simply copy/paste this into your terminal. Works on Linux/Mac.
python3 << EOF
import http.client
import json
import os
jc = None
with open(os.environ["HOME"]+"/.continue/config.json", "r") as f:
    jc = json.loads(f.read())
    conn = http.client.HTTPConnection("localhost", 1234)
    conn.request("GET", "/v1/models")
    data = conn.getresponse().read()
    jm = json.loads(data.decode("utf-8"))
    jc["models"] = []
    for m in jm["data"]:
        jc["models"].append({"title": f"{m['id']}", "provider": "lmstudio", "model": f"{m['id']}"})
with open(os.environ["HOME"]+"/.continue/config.json", "w") as f:
    f.write(json.dumps(jc))
EOF
Continue will automatically reload the config and list the available models in the dropdown.
Then simply prompt away. For advanced usage, refer to the official docs.
Sharing is caring!